In order to mange a site consisting of diverse content it is important to be able to move or even retire content and enter the appropriate redirect or HTTP response relevant to the changes as appropriate. The redirection plugin is one of the better tools for this purpose. One of the things that really makes this the go to redirect management plugin is the hit count tracking as well as the ability to import data form the other less stellar redirect management tools. The hit counter is important for proper site management so that you can eliminate any low hit redirects from the table. Simply put the fewer redirects in your table the faster the plugin can process redirecting.
This post presents some useful notes relevant to the initial and ongoing setup of this plugin. When you first activate the plugin you will see a warning badger notice in the CMS similar to the following.
Upon clicking the Redirection Setup you will be transferred to a Welcome screen that explains the general usage of the plugin. Click the Start Setup button.
After starting the setup you will be delivered to another screen with several options. I recommend the following settings.
This will initiate the system analysis and testing.
If everything is good then you can finish setup. If there are any issues they will be presented with some recommendation and possibly further documentation. Clicking Finish Setup button will proceed to the actual setup routine.
Upon completion click Continue.
Clicking “Ready to begin” will reload the page on the main redirection overview landing page. This page presents a form to add new redirects and a list of the current redirects. In addition there are a number of in page menu items.
From the in page menu we will review the options. On this page scroll down to the URL section. If you have a generic WordPress installation then it will look like the following.
It is important to note that if your site has any custom post types they will be listed and unchecked by default. You will want to check and save the settings if you want Redirection to monitor these additional content types for URL changes.
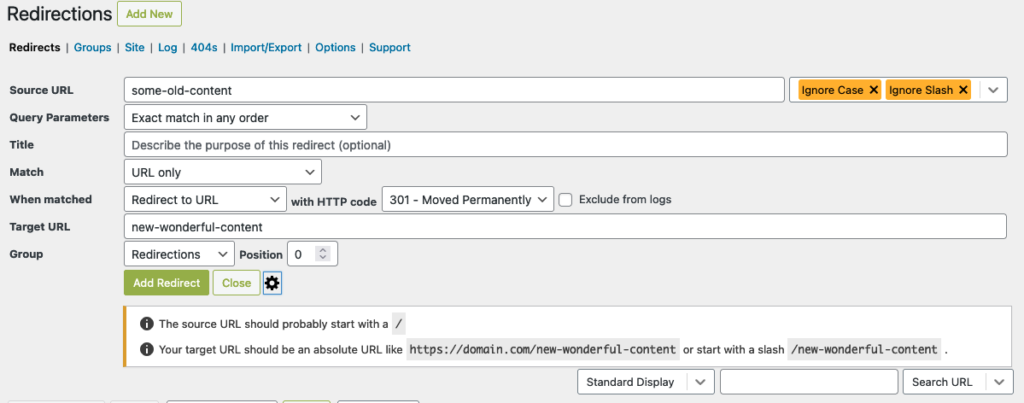
Now let’s shift to the new redirect screen for a moment. Adding a new redirect is a relatively simple affair. Enter the old URI and the new URI then click the Add Redirect button.
However before proceeding it is worth reviewing the advances settings. Therefore, click the gear to expand this screen.
In the expanded screen you have a number of additional options with the default values already displayed. For instance the default redirect type is 301 which can be problematic especially if you are working with regex redirects and have not confirmed the rules work correctly.
My personal rule of thumb is to always set the redirect to 307 until I have personally confirmed that it is 100% correct. The reason for this is that a 301 redirect is known as a permanent redirect. What this means is that the redirect is written in the visitors device permanently. If you misconfigure the regex rule you could inadvertently lock yourself out of the site you are working on permanently. Once you have confirm the redirect is properly functional then you can edit it changes the response to 301 from 307.
The final section I want to touch on is the relatively new WPCLI commands. I am not going to go through each command. I think their page as well as the internal man page does a good job of this. It’s more that you are away that these tools are available.

I hope that this setup and overview helps you make better use of this power plugin that should honestly be part of EVERY WordPress installation.


