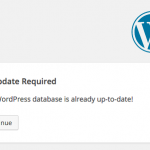
 Nothing is more frustrating than encountering a strange error after upgrading your WordPress site. Especially when it locks you out of the admin thus making troubleshooting all but impossible unless you were smart enough to self host on a system that grants you command line access. You receive the infamous ‘No Update Required Your WordPress database is already up-to date!’ message and click continue only to be redirected to the front page of your site.
It seems as if you will never attain access to the CMS again and not to throw darts but this is the time you really start to question the whole budget hosting paradigm. If you opted for the super cheap then you likely will not have access to the command line. Although I will demonstrate how to fix this from command line, fear not my friend there are ways around this so long you have SFTP (or even the regular dreaded FTP) access to the system.
No Update Required Your WordPress database is already up-to date!
The first step in resolving this is to determine what caching system your site is using. For me it’s easy as 90% of my sites use memcache with the batcache manager. In either case the first step is deactivate your caching plugin(s). It does not matter if you are running W3 Total Cache, WP Super Cache or some other system like redis the key here is to turn is completely off.
Keep in mind that a memcache cluster the cache is self healing so if you forget to shutdown even one of the servers and start things backup you will replicate the corruption across the cluster to the other servers again. So it is critical that you proceed methodically to ensure that everything is properly secured before you attempted to resume operations. Obviously if you are not running something this advanced then feel free to skip over this step.
After shutting down the caching plugin you need to ensure that WordPress is no longer attempting to send anything to the cache. I find it is best to rename the object-cache.php and advanced-cache.phpdropins to object-cache-disabled.php and advanced-cache-disabled.php respectively. Remember if you are running a cluster then you must do this on each server. Next I stop memcache on each server and depending upon your OS you might run a command like ‘sudo /etc/init.d/memcached stop’ or ‘service memcached stop’ on Linux and on FreeBSD ‘sudo /usr/local/etc/rc.d/memcached stop’ or ‘service memcached stop’.
Once you have safely shutdown caching and made certain that WordPress is not using the dropins you can reverse the process by restarting your caching subsystem on each server. Then you rename the disabled files back to their original names and reactivate your caching plugin. After this you should be able to resume normal operations like logging into your CMS et cetera.
Now both it is worth mentioning that both WP Super Cache and W3 Total Cache do have purging options built-in but if you do not have access to the CMS to use them then it is difficult to perform this sort of magick. There are also options to remotely purge the memcache cache via telnet; however, if you are not on the local system it is unlikely that you will be able to do so. If you are able to then perhaps you should look at your site security policy as memcache should not be publicly accessible.
Ultimately this is a really easy problem to fix once you take a moment to breath and assess the phenomena. Something happened during the upgrade process that has left your cache in a corrupted state that for what ever reason most caching plugins can not recover from on their own.


